Managing Videos
Videos Overview
Once your project is created, you can start adding video(s) to it.
Videos are listed in reverse chronological order of upload from left to right. If the project is set to episodic content, videos can be organised by season and episode numbers. Clicking on a video thumbnail opens the video player.
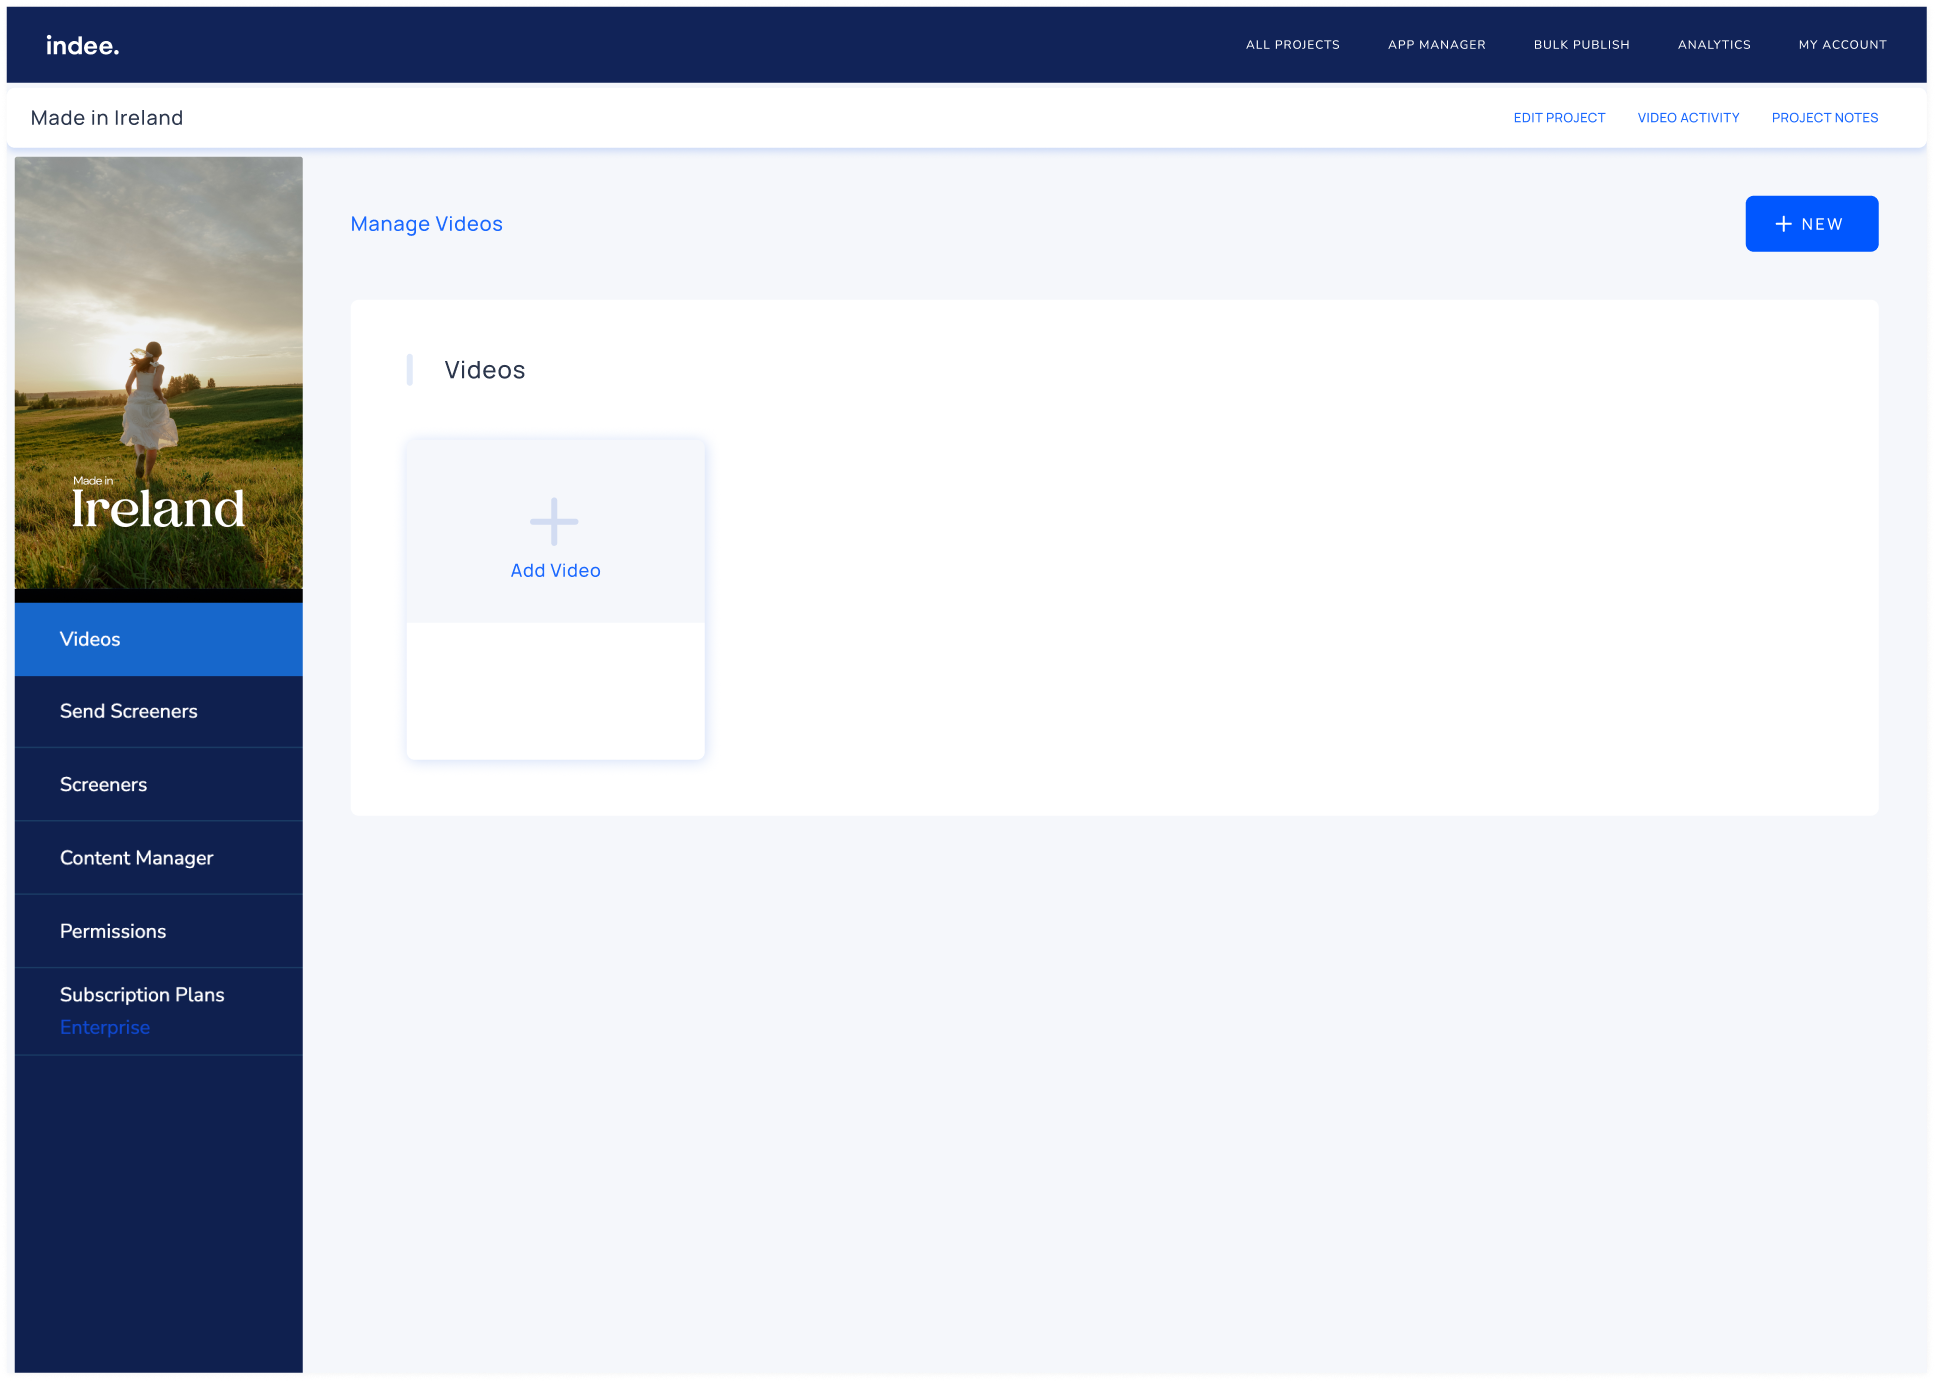
Upload a video
This process has now been split into five sections:
Video
Watermark
Subtitles
Audio Tracks
Permissions
Note: You can't move to Video, Watermark, Subtitle, Audio, and Permissions until all the requirements from the Video tab are met, and you click Upload.
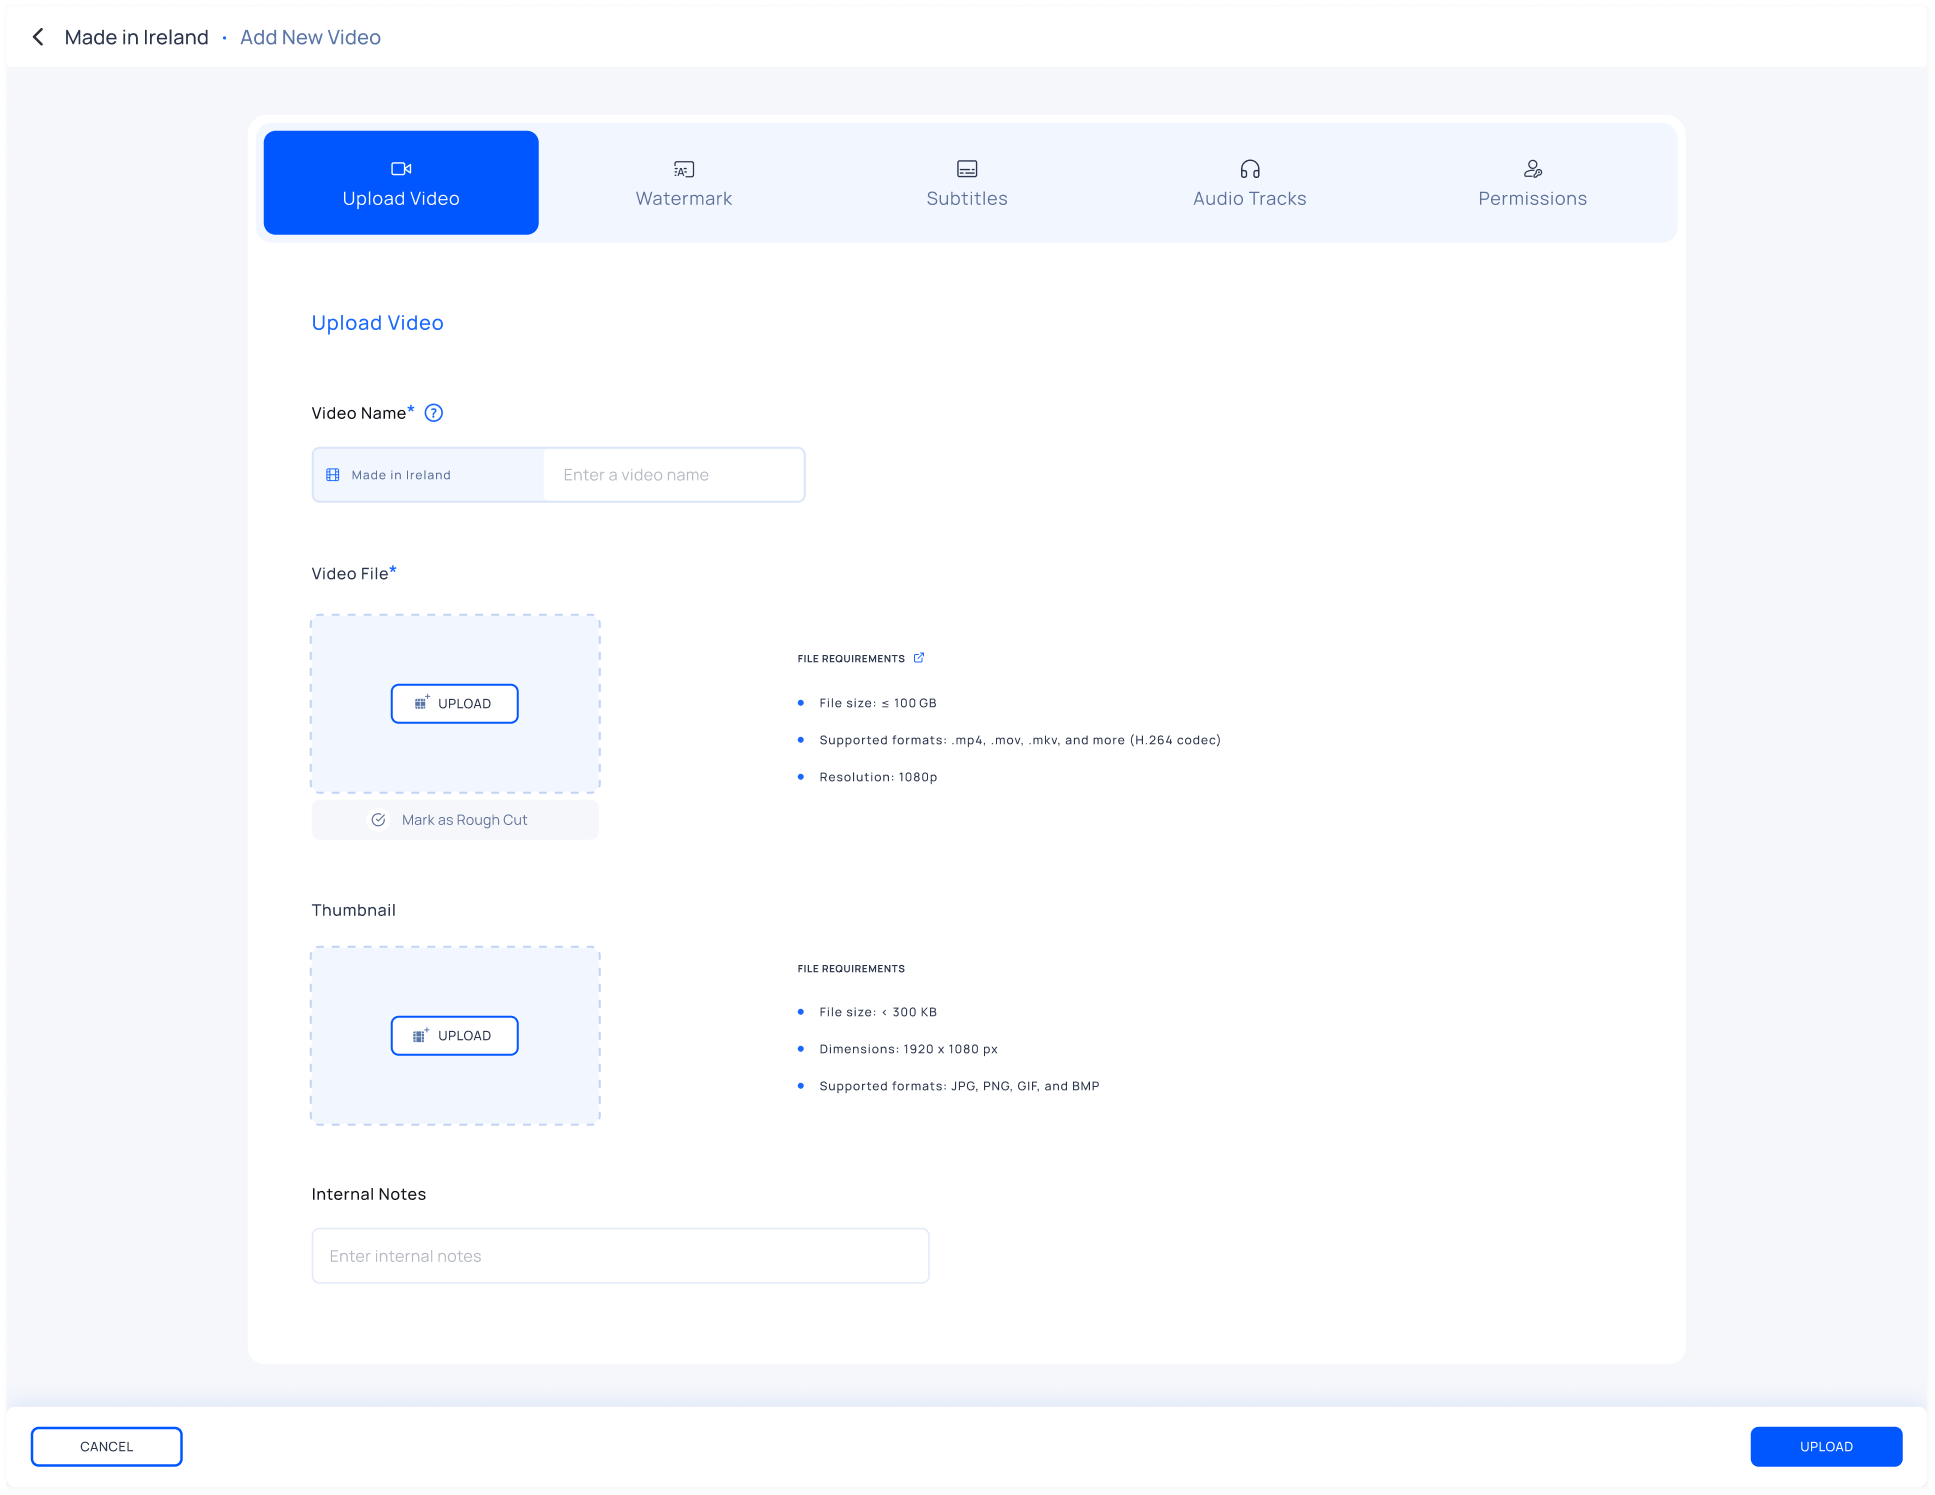
Click Add Video to get started
Enter the name of your video in the Enter a video name text field (Note: This name will appear beside the project’s name.)
Upload your video file as per our file requirements
Upload your video thumbnail as an image file, as per our file requirements
Enter any other information you think is important in the Enter internal notes text field (optional)
Click Upload to continue to the watermark page or Cancel to go to the projects dashboard and lose all unsaved changes
For episodic projects:
Enter the season and episode number in their respective text fields
Enter a brief summary in the Video description text field
Enter the original air date in the Original air date text field (optional)
Enter the cast & crew details in the Video credits text field (optional)
Note: Entering “0” in the season number text field will mark your video as a Bonus Video, and it will appear in the Bonus Content section for your audience. Click here [link to Bonus videos article] to learn more about Bonus Videos.
All videos uploaded undergo transcoding, where they are encoded with DRM and other proprietary security encryptions. The time taken for transcoding a video is roughly about its run time. You’ll be notified by email once the video has been transcoded and is ready for sharing screeners.
Watermark
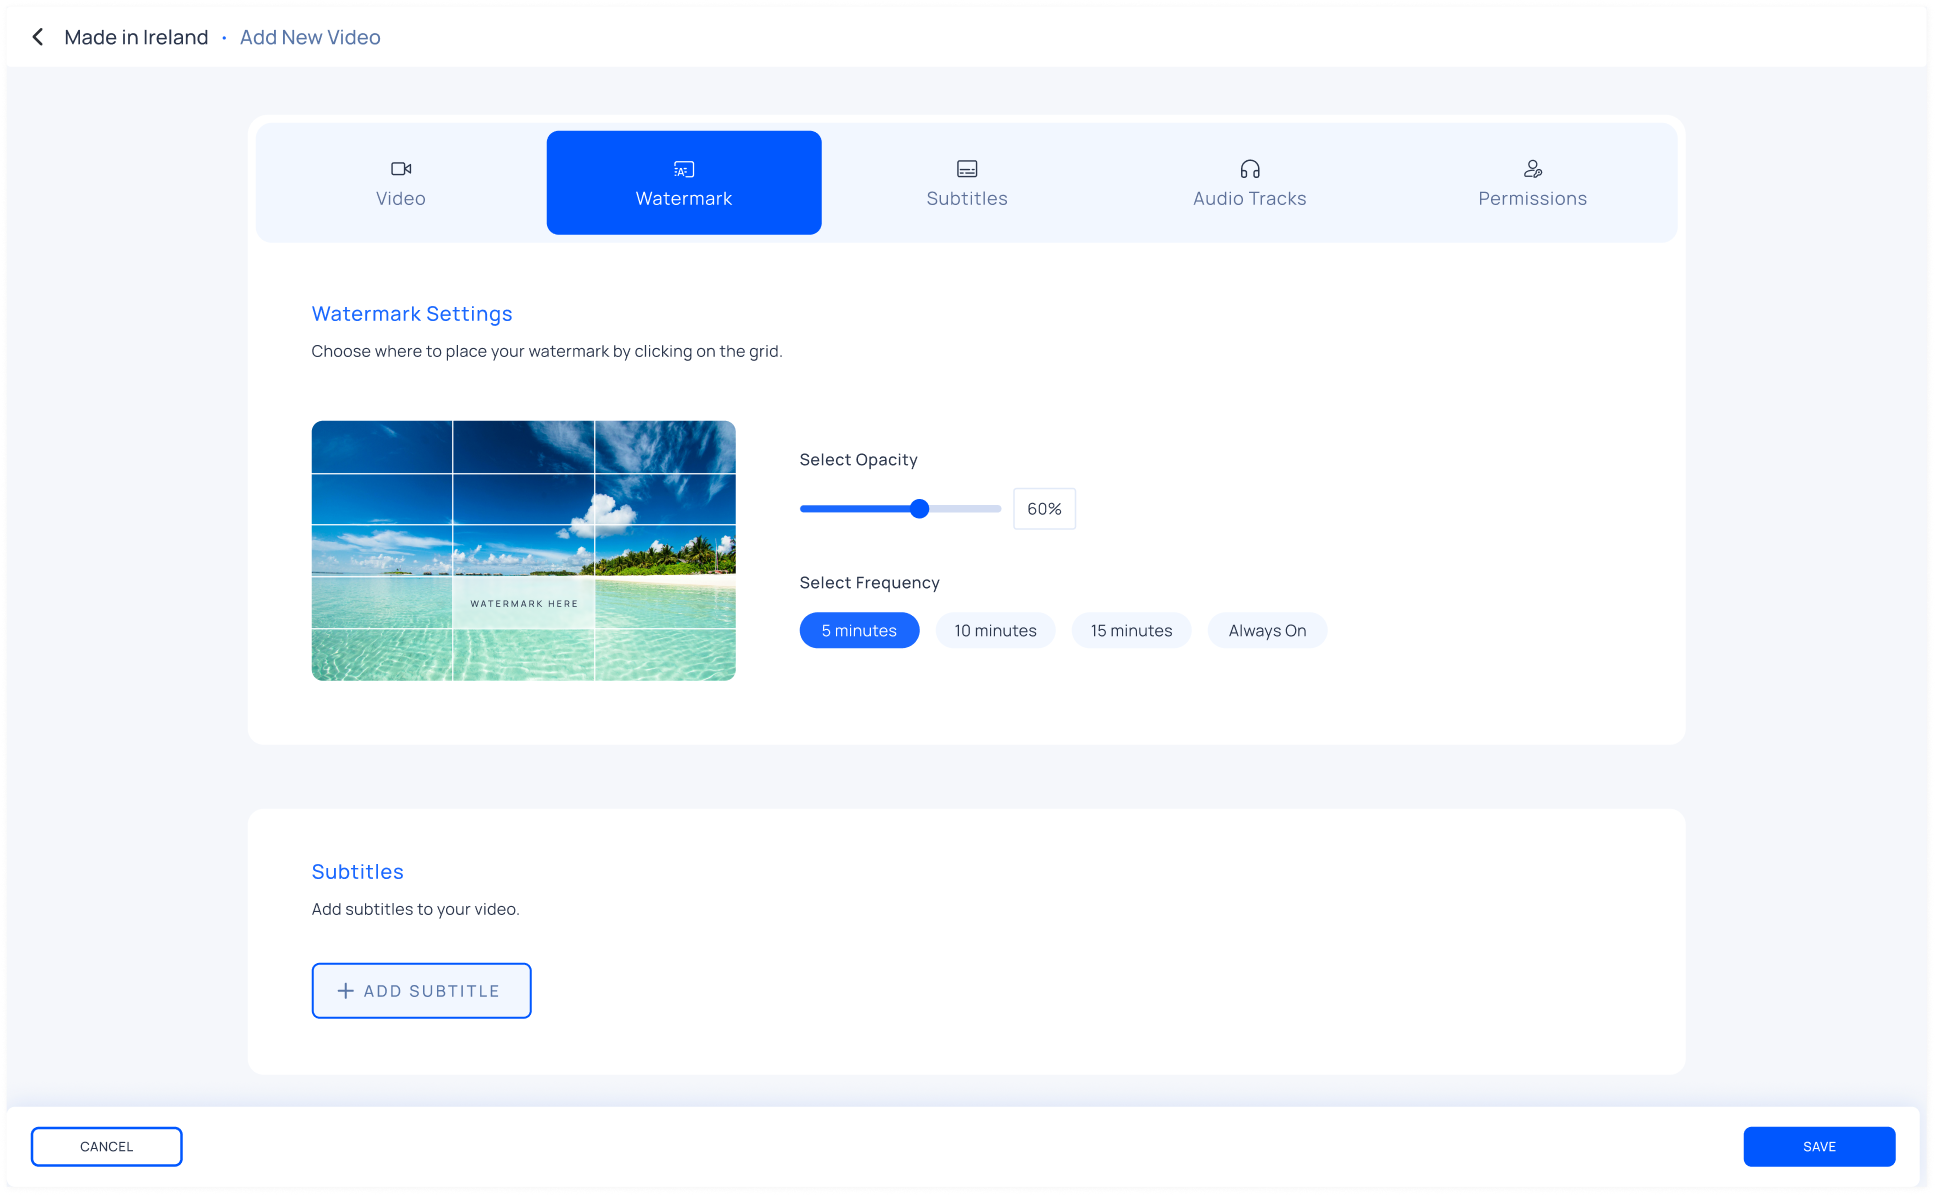
You can customize your watermark by adjusting the following settings:
Select the position, opacity, and frequency of the watermark
Click Save to continue to the subtitle page or Cancel to go to the projects dashboard and lose all unsaved changes
Note: If you don't customise these, our platform will set them based on the video length.
Position: Choose a position for the watermark from any of the 15 points on the grid.
Opacity: Adjust the watermark’s opacity using the slider. You can set the opacity anywhere between 20% and 100%. We recommend 60% for a watermark that is visible without being intrusive.
Frequency: Choose the time interval between watermark appearances.
Subtitles
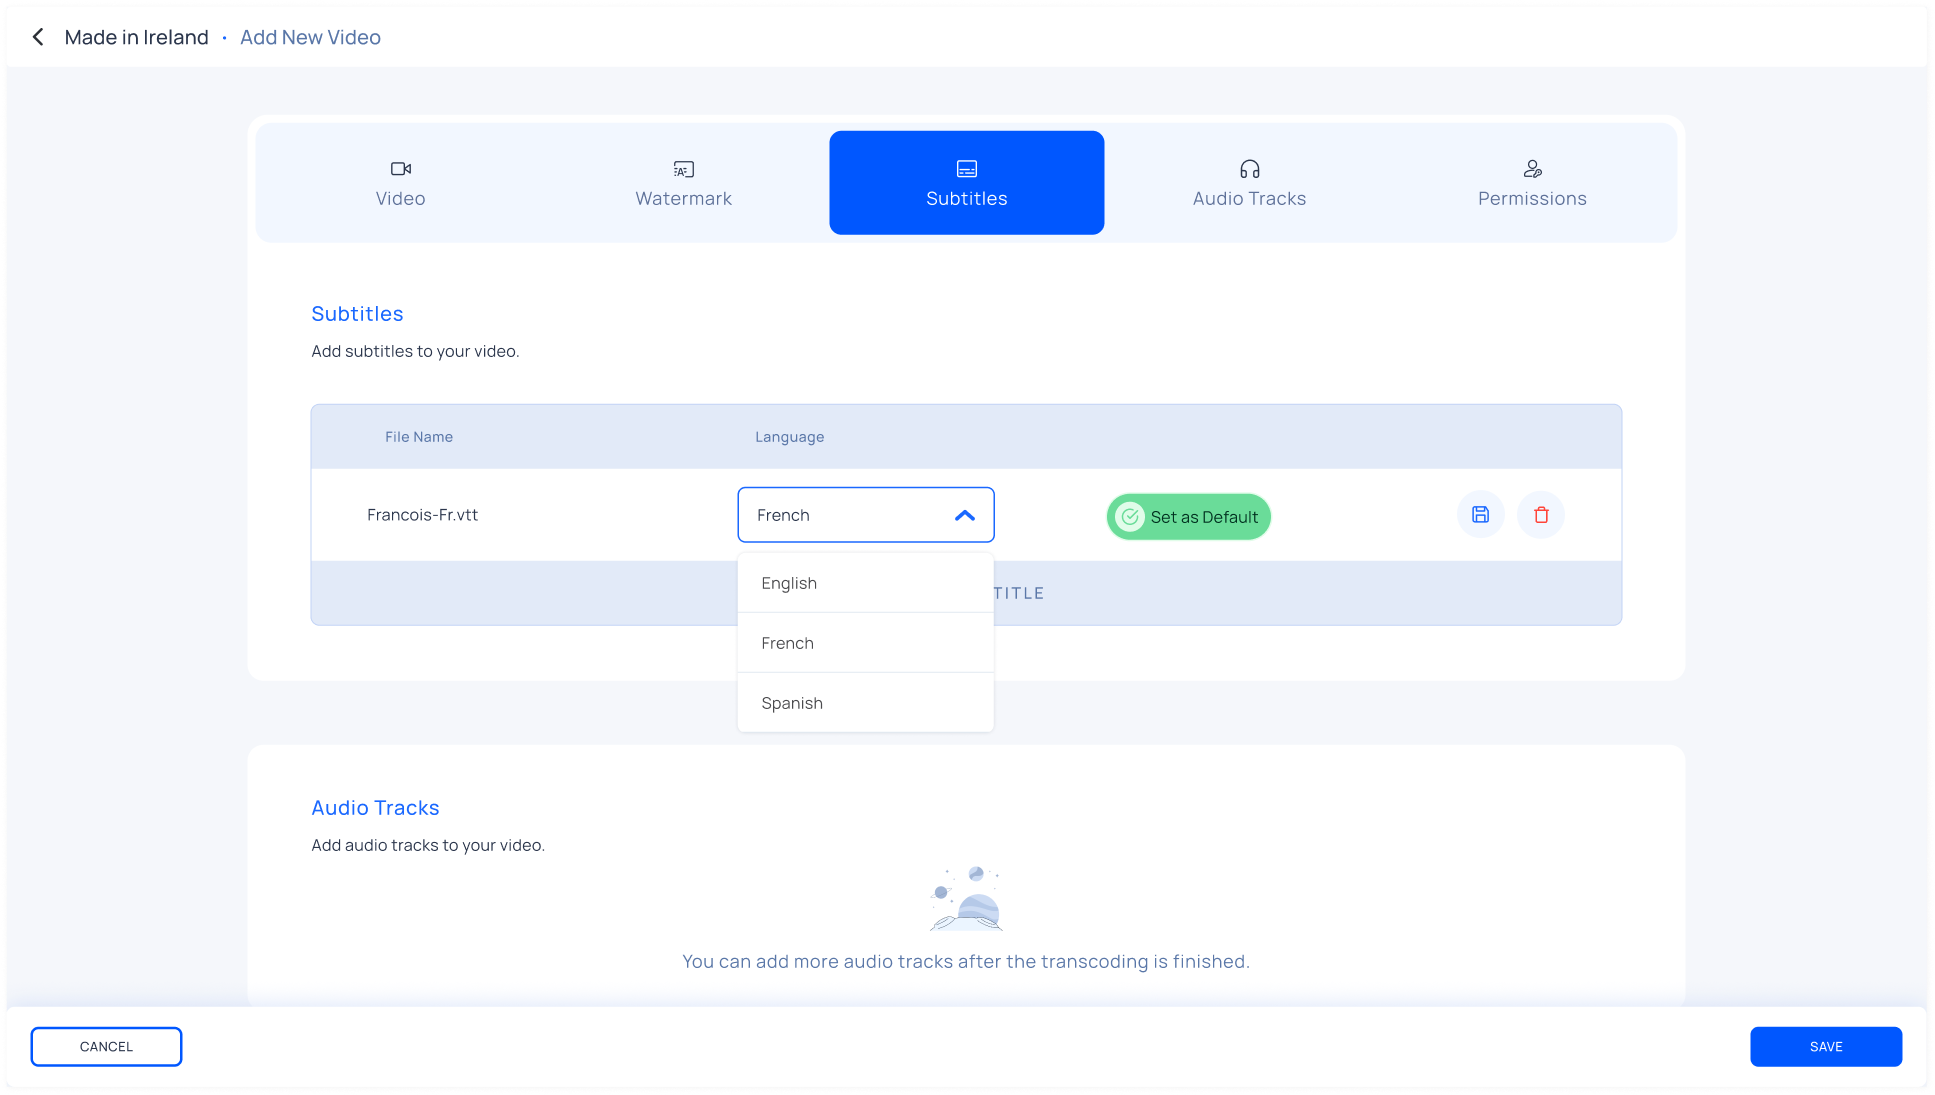
Click Add Subtitle to upload a subtitle file
Select the subtitle language
If there are multiple subtitles, you can set one as the default subtitle
Note: You can add multiple subtitle tracks for your viewers to choose from. Subtitle files must be in WebVTT (.vtt) format.
Audio Tracks
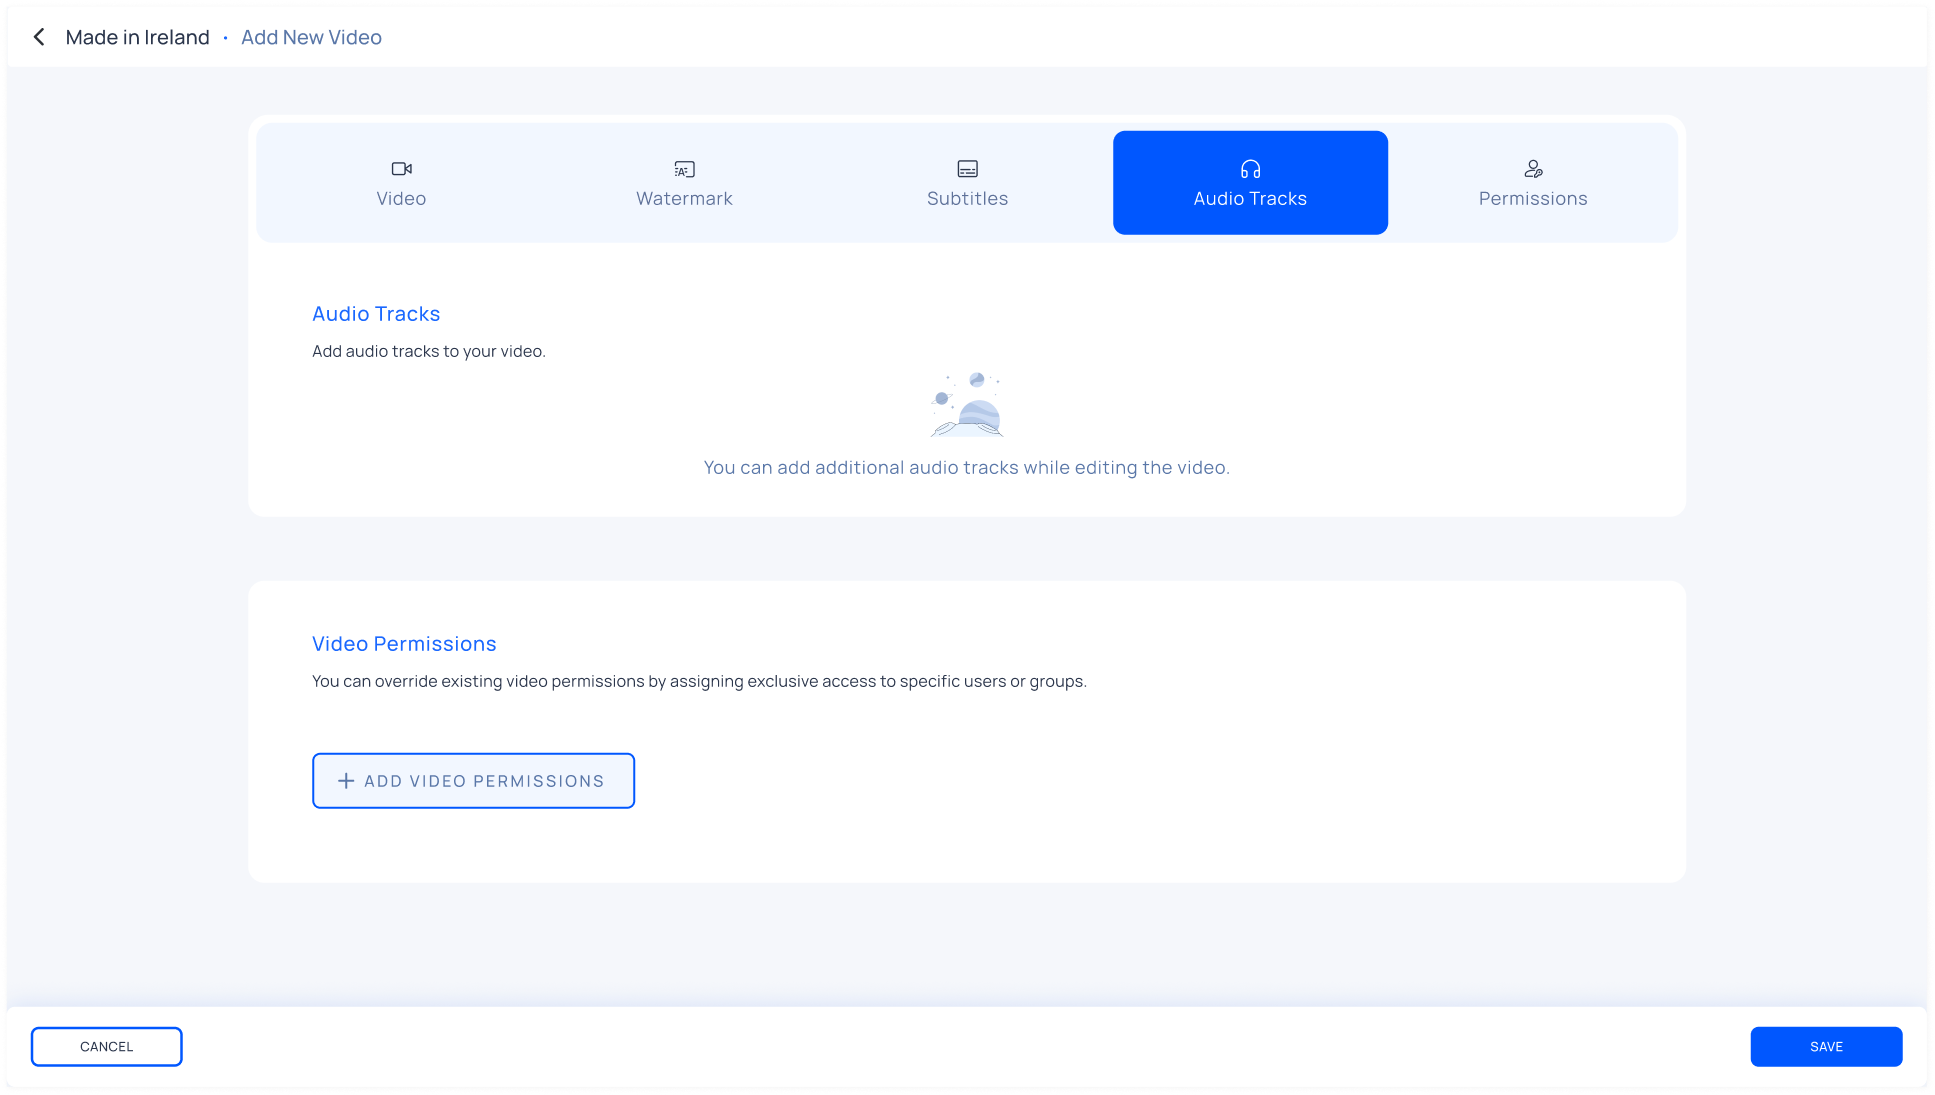
When you upload a video, its audio track is automatically added.
This audio file cannot be deleted until you upload another file
You can only add additional audio files after your video file has been uploaded and transcoded.
File Requirements for Adding Additional Audio Files:
MP4 with AAC stereo
Duration cannot differ from the video by more than 1 second
Unique track name
Note: Only one track can be the default, but you can change it if there are multiple tracks.
Permissions
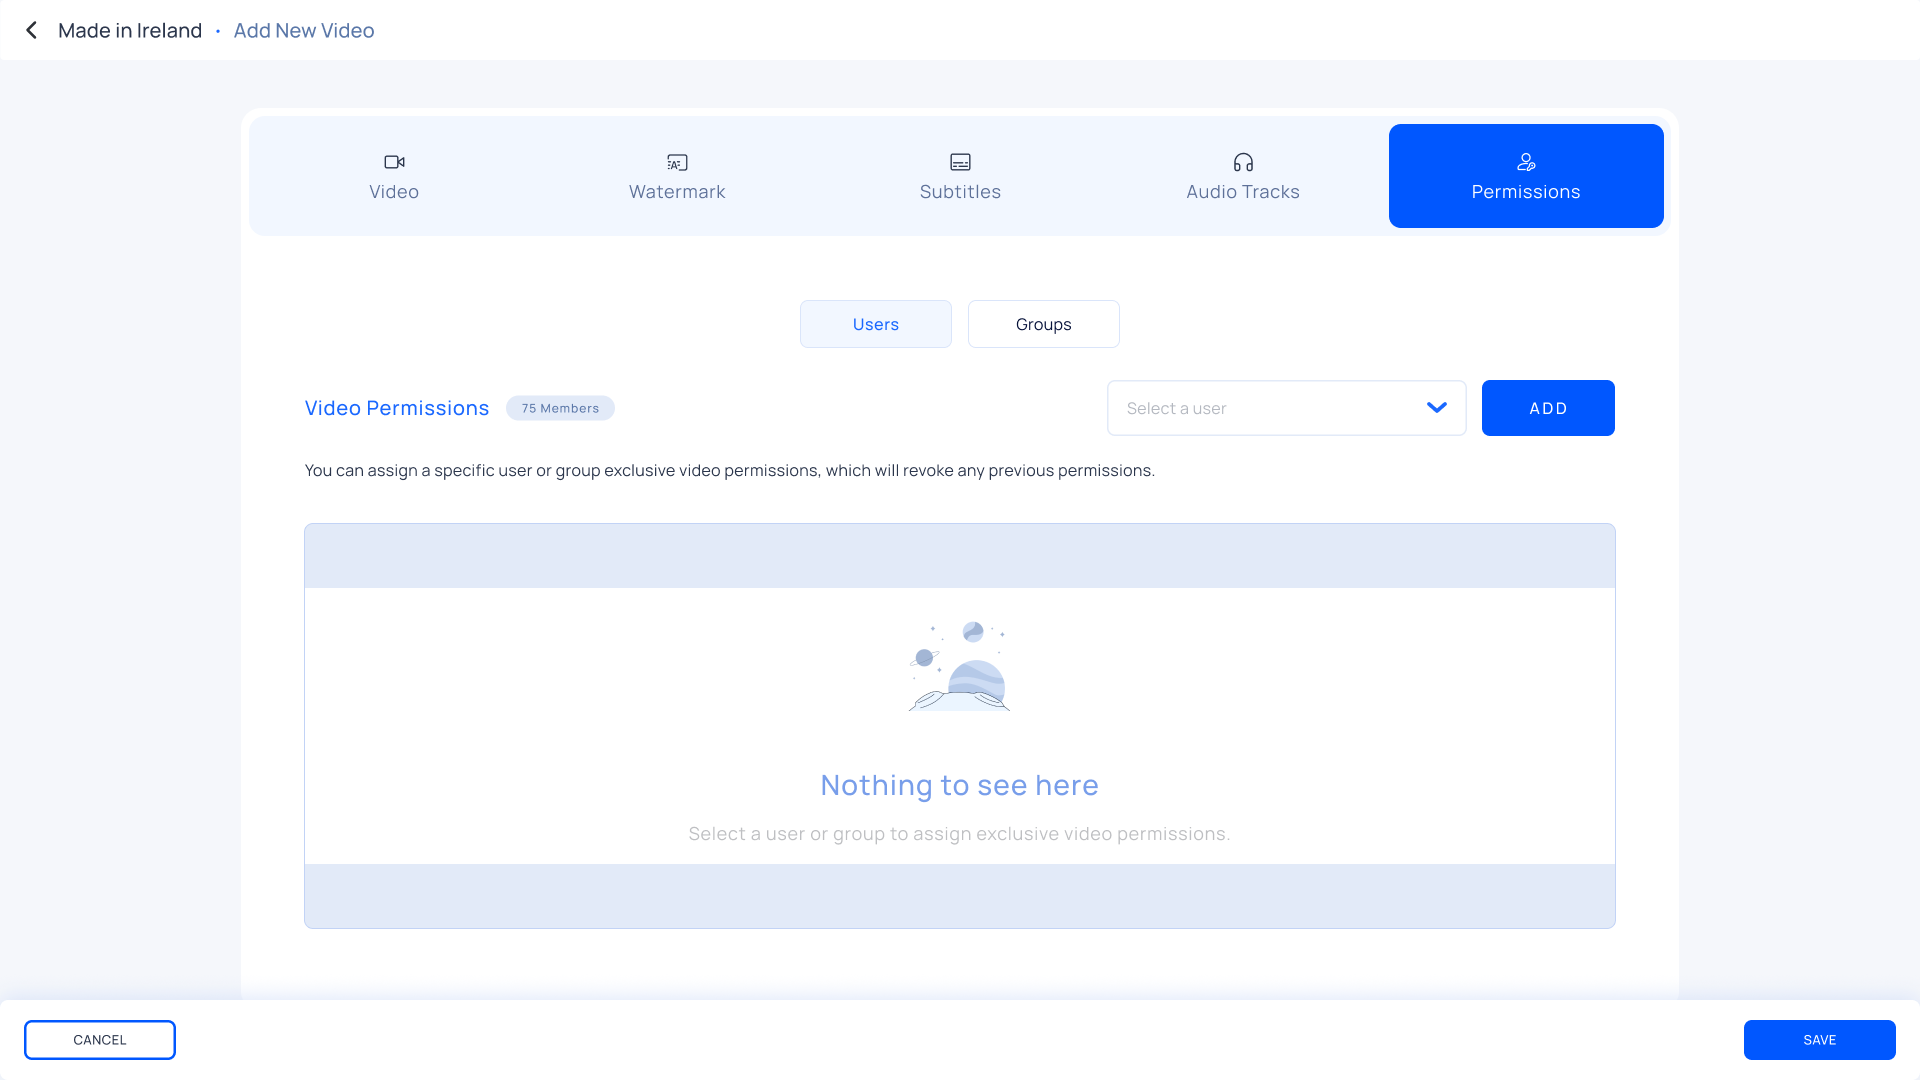
Video Permissions give users special permissions for a video that override previous permissions.
Select Users from the dropdown (only users who have been added to the project will appear here)
To add a group, switch to the Groups tab, select the group from the dropdown and choose their role
See video permissions for more information.
Note: Users and groups need to be granted access to the project in order to be given video permissions.
Edit a Video
On the Videos section of a project, click the edit button. You can then make changes to the:
Video details
Watermark
Subtitles
Audio Tracks
Permissions
How to Add Additional Audio Files
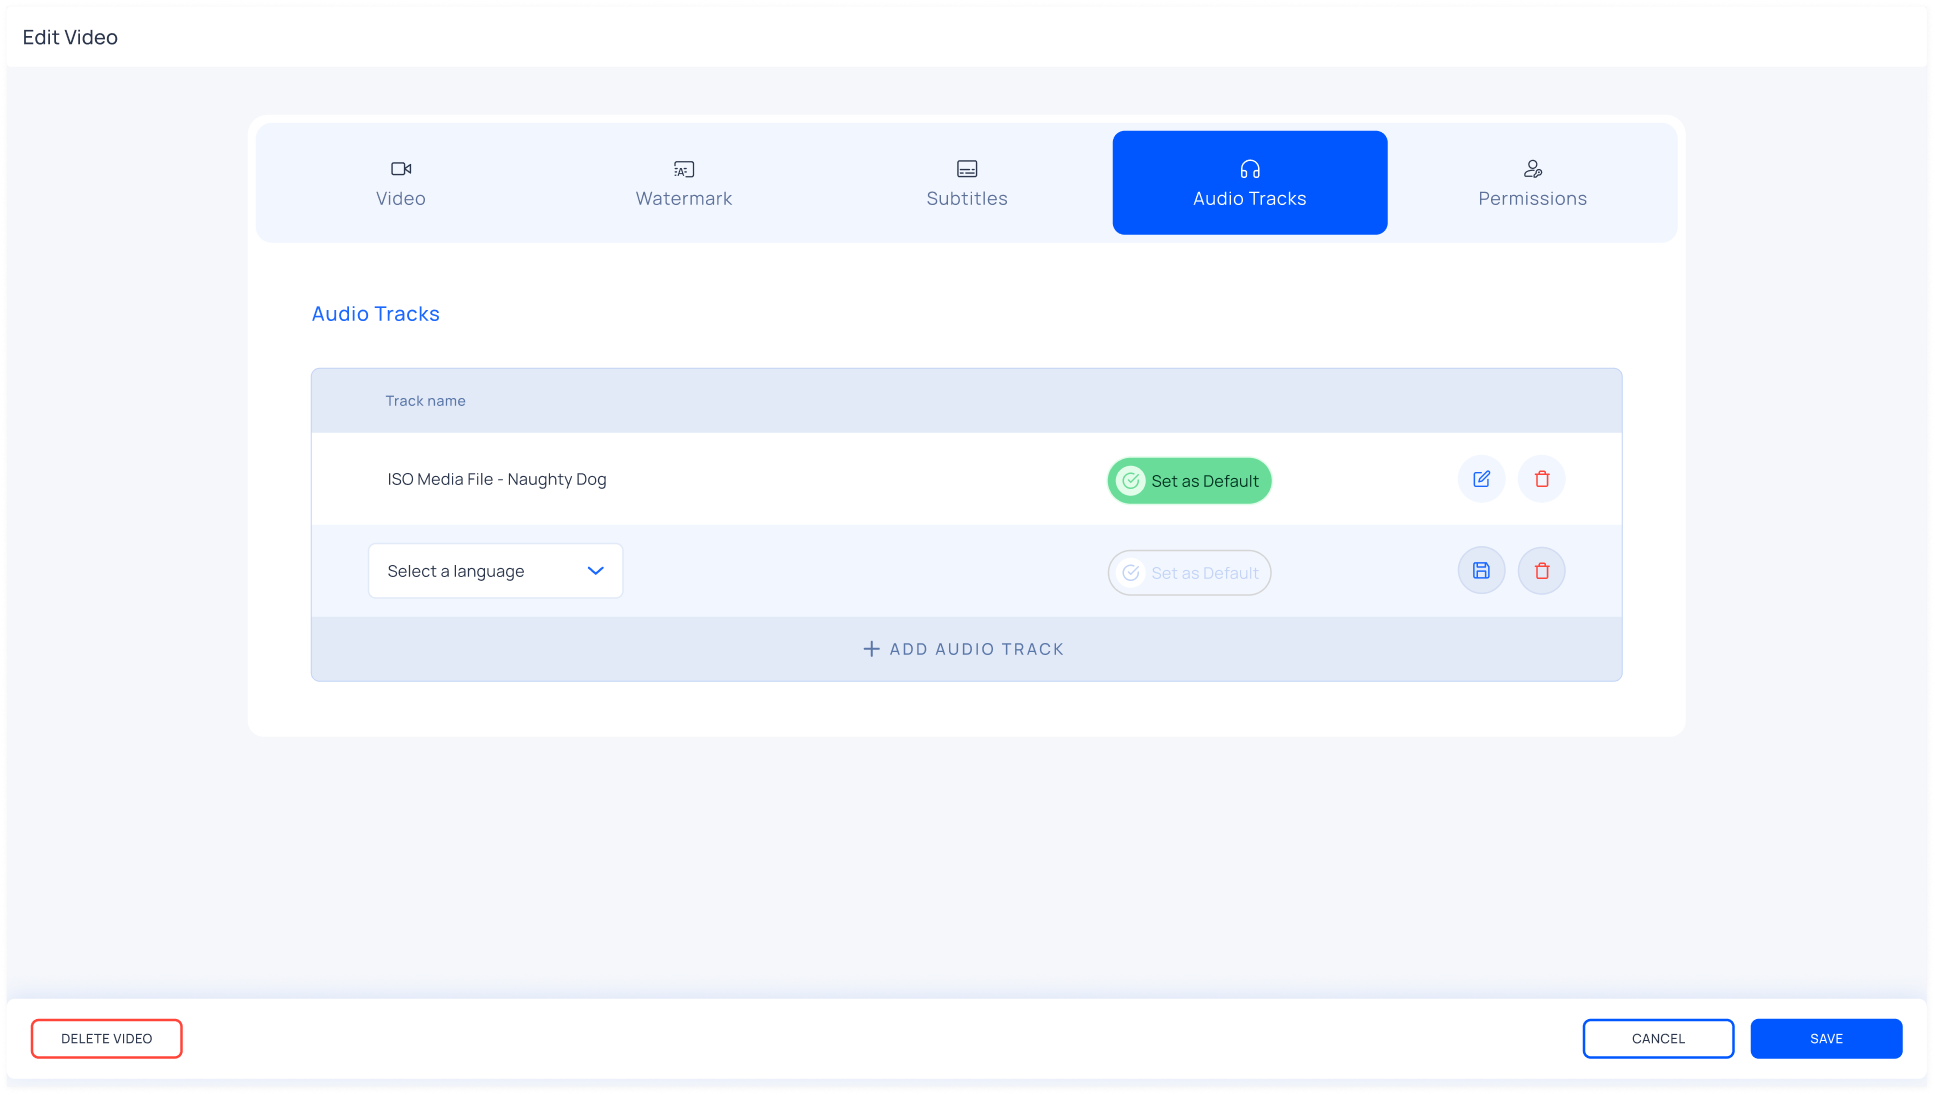
Edit your video
Go to the Audio tab
Click Add Audio Track
Choose a language from the Select a language dropdown
You can set this as the default audio track if you want
Note: You can only add additional audio tracks after your video has been uploaded and transcoded.
Delete a Video
On the Videos section of a project, click the edit button and then click the Delete Video button.